Growing Hawaiian Gourds (Ipu) in Arizona


Photos: Courtesy of Kehau & Ka’imiloa Chrisman
An article by Kehau and Ka'imiloa Chrisman
Ka’imiloa Chrisman, Cultural Advisor for the Halau, has spent more than 15 years of his life trying to re-create the lost ancient Hawaiian art of gourd decoration called Ipu Pawehe. He has been successful, and a book is in progress to document his findings.
In order to do this art, he discovered that a fully-mature green gourd was needed. This meant that the cultivation of these gourds had to be perfected, so that enough ipu were produced to conduct the experiment. Not content to just purchase some seeds grown elsewhere in the world, he sought out gourds that were native to Hawaiian soil, extremely rare today due to all the plant diseases and pests now introduced in Hawaii. The Hawaiian gourds were known for having a strong, thin shell. The Hawaiian seeds have recognizable characteristics.
The cultivation of Hawaiian gourd plants in volcanic soil and in an 85% humid environment produced numerous crops to affect our experiments. There is no reason why these seeds can’t be grown in Arizona. However, we must make certain allowances for the shorter growing season due to the Arizona winter months in the Verde Valley.
Gourds need lots of water in their early stages. When the plant matures, the shallow roots delve a bit deep into the soil searching for ground water. Constant watering at this stage is not necessary. The heat—and our Arizona summers provide lots of it—is necessary to harden the shell as the fruit matures. The growing season is approximately 6 months. Just before the first frost hits, or sooner, the gourds should be taken off the vine. However, they may not be fully mature and this complicates their usage.
Soil Material
Start with high-quality potting soil purchased from your local garden center, (eg., Supersoil). Mix a little vermiculite or pearlite with the soil to allow aeration, or use 1/3 your soil and 2/3 potting soil. Put your soil mixture in little potting cups that will allow water to drain. Pressed peat moss cups are not necessarily better, as the roots have to fight their way through the cup wall. Inexpensive potting trays or cups served our purposes well.
These seeds have been in storage for quite a while. If you soak them in warm water for 16 to 24 hours prior to putting them in the soil, you will help soften the outer shell so the seedling doesn’t have to “fight” too hard to break it. We found that sometimes this would make a difference.
Place between 1 and 3 seeds in each cup. Insert the seed narrow point down. Make sure the top of the seed lies about ½ to ¾ inch below the soil surface. Cover the seed with soil, and press down gently to pack the soil around the seed.
Water generously and daily in this early stage of development. Don’t use chlorinated or water-softened water. Rain water (good luck!) is ideal. Keep your pots indoors until the outside temperature goes no lower than 65 degrees. Provide as much warmth from sunlight as possible.
Seedlings usually emerge between 9 and 14 days, depending on seed genetics. If they don’t emerge by the 14th day, you can apply 1/3-strength Miracle-Gro solution. Don’t get discouraged, and never stop watering the seeds. Do remember the dilute Miracle-Gro trick. In extreme circumstances, we have had seeds propagate after lying in soil about a year, after heavy rains!
Transplanting Seedlings
Gourd seedlings emerge like squash or pumpkin seedlings. The primary or sprout leaves show up first, followed by the first set of secondary leaves. When this little keiki plant has 3 small, but actual leaves, transplant it into a bigger pot (about 6 inches), handling the stem very carefully. It will probably outgrow the 6-inch pot within about 2 weeks. Do not let it get root-bound. If the plant is taller than the height of the pot, it is already root-bound.
Ideally, if your climate condition is favorable, you should eliminate this 6-inch pot step, and put it directly into the ground. My experience has been to dig a hole in the ground, put a mixture of Supersoil and your own soil at the very bottom of the hole, water it intensely, and then put your plant in, patting this soil mixture down firmly around the plant. Keep watering the plant daily until you are confident that it can take an every-other-day watering.
If you have any access to sandy river bottom land, this would be the ideal place to grow them.
Your plant will spread out to a minimum 10’ x 10’ area. Be sure you have enough room for the plant to spread out. Runners from a good plant can go as far as 50 feet! Grown next to a fence, the vine will attempt to climb the fence. You may want to discourage this as the fence will scar and damage the fruit shell. It’s important not to grow these gourds within a quarter mile of other gourds. They WILL cross-breed and you will not have a pure strain of these rare Hawaiian gourds.
Mature Plants
Plants will grow rapidly and spread profusely. White flowers will start to emerge at night, and die back by the next morning. Male white flowers with stamens emerge first to attract the night insects that help with pollination, and female flowers with globular segments in the middle come next. To insure the creation of a fruit, go out at night, and fertilize the female flower with the stamen of a male flower. Remember, all flowers will die the next morning, so you aren’t “wasting” any flowers—just helping nature along.
Within 2 days, you will know whether you have a viable fruit or not. The “bulb” beneath the female flower will start to grow rapidly. At three days old, we recommend covering the fruit loosely with cheesecloth to avoid bites from fruit flies. If cheesecloth is not available, take a brown paper lunch bag, open the bottom of the bag, and clip the top of the bag loosely around the stem of the fruit with a clothespin.
Hawaiians called the ipu their “babies”. They must be checked daily. Once the fruit gets to be about 5 to 6 inches in diameter, the fruit flies no longer find their skin soft enough to lay their eggs.
In Hawaii, we had trouble with fungus and mildew. In our dry climate, this may not be an issue, but keep careful watch. If you have any problems, be sure to water the ground and not the leaves.
You may also want to experiment growing them hydroponically. You will need a 55-gallon drum to accommodate the root system. You must maintain careful chemical analysis of the water to make sure there are adequate nutrients. Do not attempt this if you are not familiar with this method.
Gourd Shapes
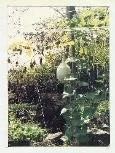
Basically, the gourd will take the shape that its genetics tell it to take. You may try to shape the gourd yourself—some Hawaiians have done this is the past—but this may not be necessary. The shape of your gourd is drawn on the seed package. As the gourd gets heavier, you may want to give the stem enough allowance so that the stem connection at the gourd is always facing up. A plant whose stem pulls the neck of the gourd downward will yield a gourd whose neck is permanently fixed downward. Hanging a gourd from a trellis is possible. Use strong “hog wire” with openings about 2” x 4” as the top of your trellis, and use stout posts. Set the wire top about 6” more than your height.
Be cautious at this stage of development. Any tiny scratch on the thin outer skin of the green gourd is permanent, and cannot be “erased”. If you are hanging a gourd from a trellis, be sure that a heavy wind will not cause it to collide into a board, etc. that will permanently scar the gourd, or even crack open the shell.
Rotate the gourd on its bottom every couple of days—about a ¼ turn—so that you are assured a flat bottom. You might want to even place it on a small piece of plyboard.
Harvesting Gourds
Towards the end of the 6-month growing period, the plant leaves and stems will start to turn brown and dry. You may think at this point that the plant is dead, and that you should clip the fruit from the vine. DON’T DO IT! The gourd fruit is still drawing nutrients from the stem. Allow your fruit to mature “on the vine”.
Watch the top of the gourd where it connects with the stem. If a “brown” dryness starts to creep from the stem connection outward, then the gourd is fully mature and can be harvested at this time.
Cut the gourd from the plant, and bring it indoors. To help distribute the moisture that’s inside of the gourd, you may choose to store it upside down (butt end up), being very, very careful not to scar the outer layer of skin. This may not be necessary here in Arizona.
As the brownness creeps further out from the stem, you may choose to take the outer skin off, using a single-edged razor blade. Scrape every last bit of outer skin from the gourd, and your gourd will dry to a nice golden color. If you leave bits of skin on the surface, mold may form and discolor the shell permanently. Once all the skin is removed, turn it upside down again and let it dry on its own. Again, this may not be necessary in the Arizona dry climate.
As your gourd dries, it will become lighter and lighter in weight. It may take 3 to 6 months (probably shorter here in Arizona) for the gourd to dry fully. It is much easier to clean the inside of a gourd after it has dried completely. This is how you will get the finest of gourds.
Be mindful where you store your gourds after they are dried. Rodents think that a pile of dried gourds full of seeds is a smorgasbord and will go from one gourd to the other, eating holes in the outer shell to get to the seeds. Often you will not find the holes until it is too late. Suspending the gourds in a net from a ceiling may help.
Contact Us
These gourds have been cultivated by us in Hawaii. Each plant’s genetics has been carefully monitored. We are expert at growing them in Hawaii, and hope to learn from you how they do in Arizona. Please contact us with any questions and keep us informed of all the progress that you are certain to make!
© Copyright 2006 Kehau Chrisman. Any reproduction without permission is in violation of copyright laws.